Archive for the ‘Dried Herbs’ Category

h1

March 30, 2014: Making a Bouquet Garni

March 30, 2014

Bouquet Garni1When one wants to add whole spices into a dish, yet have a convenient way to remove those spices after the dish is cooked, the easiest method is to make a bouquet garni (French for “garnished bouquet.”) This is simply a bundle of spices wrapped in cheesecloth and tied up with neutral kitchen twine.

I added a bouquet garni to both the beef bourguignon and the ratatouille niçoise, two weeks ago for Katie’s French Dinner. I made a separate one for each so that I was able to differ the spices slightly between the dishes.

Bouquet Garni2

First I cleaned and cut a long stalk of celery in half. In one half I layed parsley stems; a Turkish bay leaf; peppercorns; and French thyme. For the beef bouquet garni, I added juniper berries. Then, I placed the other half of the celery on top, fitting the two groves inside one another. I then rolled the celery-wrapped spices in a short sheet of cheesecloth and tied the ends with kitchen twine. For both dishes, I added the bouquet garni at the beginning of the simmering process. After the dish was cooked, I removed the bouquet garni with tongs and composted it.

Bouquet Garni3

My version is little fancy and only slightly time-consuming. My mother used to simply tie the spices in a cheesecloth bag and snug the end closed with twine. It’s a tiny bit of extra work at the prep stage, but a bouquet garni pays off, allowing you to add specific flavors to a dish and then being able to quickly remove the bundle at the end of cooking. It is especially handy when you are rushing to get several elaborate dishes to the table quickly.

I never bother making a bouquet garni for stocks, as I am always filtering out the components of the stock anyway, but after the stock is made, a bouquet garni is ideal for later adding specific flavors to a complex soup like Bouillabaisse.

h1

October 19, 2011: Foodblogging with Escher

October 19, 2011

MC Escher "Bond of Union" 1956

Last week, I get a link from a fellow foodblogger who calls her blog “Feral Homemaking.” I am always honored when I receive these link requests. It means someone who does something very similar to me, has seen World of Okonomy and found it worthwhile. A very flattering gesture from a peer. As always, I look over the blog and as I am looking over “Feral Homemaker, I find myself really liking it, first, as it has a very unique voice. It’s foodblogging from the hip: straight opinions and smart writing on not only important things like economy for the home but also fun topics that might (or might not) be tangential to cooking. The blog has cool recipes and something I’ve haven’t yet seen: a foodblogger who’s brave enough to actually post what doesn’t work in their cooking! After all, cooking is always at least a partial experimentation the first time you make a recipe. Part of the process of cooking, is analysing what doesn’t work and fix if for the next time. I took a quick look at the “About” section to find out who this blogger is, but the information there was a bit skimpy, but I was hooked and I immediately added “Feral Homemaking” to my blogroll, I even posted a tweet on Twitter about how cool I think the blog is.

On Sunday, I got a very nice visit from my good friend, Pamela. Yet another good friend contributing to my skimpy larder, Pam brought a huge store of canned and dry good as well as a bushel of fresh veggies from her CSA: rainbow chard, kale, red cabbage, salads, spinach, daikon, fresh herbs, and squash. She also brought her own canned veggies. I had forgotten that Pam did canning, but her’s were wonderful: crispy dilly beans; pickled tomatoes (both green and red) and beets. After wolfing down the first jar, I had to move the rest of the jars out of my sight, as they were so delicious, I would’ve eaten the whole lot!

I took Pam through the Wayside Inn area near me. We followed the basic route that Lisa, little Harry, and I did in my “August 30, 2011: Speaking at Geese.” One variation is that when we ended up in the drygoods store that Harry found “BOR-ing!!!” I found that they had a whole other floor that I had never visited. Poor Harry! If only he could’ve held out a little bit more! This floor was full of the coolest toys from end to end! Harry would’ve loved it! As Pam and I are picking through toys that we remembered from our childhood, we are talking about blogging in general and that moves naturally to foodblogging and Pam casually mentions “Well, in my Feral Homemaking blog, I…” Suddenly, it’s like I stepped into and Escher drawing! “WHAT! WaitaminuteYOU’RE the Feral Homemaker!!!” Pam assumed that I had known all along when she sent me the link!

I hope that Pamela takes my appreciation of her blog, absent of my  knowledge that it was her writing, as the highest praise. It’s rare event to be able to offer a “no-strings attached” compliment to the people in our lives. I tell everyone that my friends and family keep me on my toes, as collectively they are the most talented, interesting, kind, and REAL people I have ever known, and by their example, make me want to be a better person!

…and now what a treasure to visit Pam’s blog: a rare chance to look anew upon an old and valued friend, this sparkling Mobius-strip of a personality who twists through my life!

h1

June 08, 2011: Dried Dill

June 8, 2011

Two of my favorite summer foods are my own potato salad and iced green tea. I’ll save the tea for the next post, but potato salad…quartered potatoes, sliced radishes, chopped celery, spices, mustard and mayo make a wonderful combination, but it is chopped fresh dill that makes it work. The trouble is that you can’t use the entire bunch of dill, unless you’re making enough potato salad for an army, and it goes bad soon. Solution: dry it. Now, this is old hat for those who have dried herbs before, but if you’ve never done it, it’s super easy to dry herbs that keep for much longer than fresh. You can also save a good deal of money: one bunch of dill dries down to about .3oz. of dried dill, which cost almost $6 at the store.

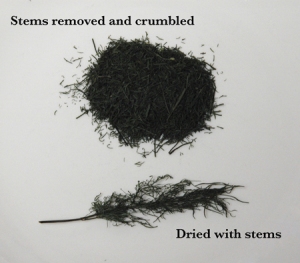
Preheat oven to 300°F. Remove the very ends of stems of dill. Wash and dry dill well in a salad spinner. Put whole dill (no need to remove stems before drying) and spread out on a cookie sheet with tin foil. Lower heat to 200°F and put tray in oven for about 20 minutes. Dill should be dry, crisp, but not burnt.  Cool. Rub dill to remove stems and discard them. The whole process takes about an hour at the most and you could do many different herbs at once.

1 Tblsp. Fresh Herb=1 Tsp. Dried Herb